Wednesday, April 30, 2014

Women's Studio Workshop

I wish I took better advantage of my education when I was younger. I was lucky enough to go to a 4-year college but I wish I had taken more classes outside my major concentration than I did - namely art classes. As an adult, I have been back to school a million times, taking undergraduate art courses as well as adult education workshops (where I stumbled upon papermaking two decades ago!). One of the places I attended a few years ago was so valuable for advancing my education in the papermaking field. I discovered the Women’s Studio Workshop in upstate New York and took a weekend workshop there. It is one of the few places in the country that I have found with dedicated papermaking workshops and an incredible studio with everything you need to make all kinds of paper. (The other place is the Penland School of Crafts in North Carolina. Taking a week-long course there is on my Bucket List! And if I do go, I will go out of my way to eat at Tupelo Honey cafe in downtown Asheville. The homemade biscuits with honey butter and blueberry jam are heavenly. The shrimp and grits are even better!)

Food always makes me digress....

I really loved my experience at WSW. It was afforable (unfortunately, it is a lot more expensive now) and I learned so much. It was incredible having access to the papermaking equipment they have in the studio: 2 Hollander beaters, a hydraulic press, a vacuum table, stack dryer and an outdoor cooking facility for fibers and dyes.

This summer, they are offering the following papermaking workshops:


* Paper and Place

* Handmade Paper and Encaustic

* Sculptural Papermaking: Unusual 3D Techniques

* Mold Making for Casting Handmade Paper or Clay Objects

* Paper + Dye: Japanese Papermaking and Natural Colors

I am most intrigued by the The Paper and Place workshop. Here’s the description: “Exploring the process of hand papermaking yields opportunities to incorporate natural materials directly into paper art. Participants will construct 2D and 3D works of paper, choosing materials that become part of the content. Paper pulps such as linen, flax and abaca provide a neutral palette for mineral colors, natural dyes, and plant and seed textures. Students will learn how and where to harvest and collect plant fiber locally (and grow their own). A variety of artistic papermaking techniques will be covered, such as using a deckle box, embedding plants, wet collage, and creating simple book forms. Colors will be derived from mineral and plant sources. The emphasis will be on creating unique works of paper that reflect elements of the natural world.”

Sounds exciting and inspiring. Almost as much as those Shrimp and Grits. Now where did I put that recipe?


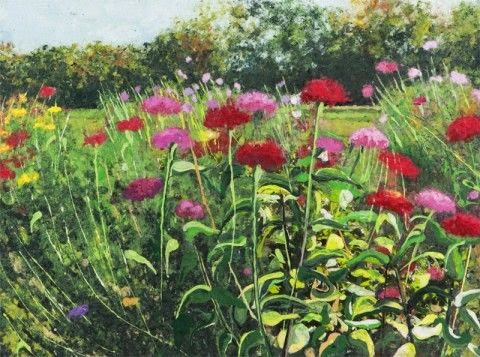
(Photo courtesy of Women's Studio Workshop, shamelessly lifted from their website)

Friday, April 25, 2014

Papermaking list serve group

If you are a serious papermaker and haven't heard of it, you should check out the Yahoo groups papermaking list serve group. There are people from all over the world on it and you can ask questions, share knowledge and even buy and sell your papermaking-related supplies. For me, the greatest aspect of being a part of the group has been joining in the annual Swatch Swap. A brave soul in the group volunteers to organize it and then all participants send in a predetermined number of swatches of paper with their recipe attached. The volunteer leader puts it all together in a book and sends each participant back a book with one of every swatch in it. My Swatch Swap books have a special place in my studio and I go to them for inspiration... or just to stroke all those lovely papers. Even if you missed out, you can still get your hands on one of these highly-prized books. The annual Hand Papermaking auction is on now and there are a couple of Swatch Swap books up for auction as part of the fundraiser. Check it out here:

http://www.ebay.com/itm/Two-Swatch-Swap-Books-2010-and-2013-/291127983757?pt=Antiquarian_Collectible&hash=item43c8947e8d

Good luck at the auction!

Tuesday, April 22, 2014

Happy Earth Day!

Some plantable paper earths to celebrate the day, made by swirling together blue and green pulp. Ya gotta love your Mother!

I was inspired to create these paper earths after I read a quote that I found very moving by Chinese philosopher La Tzu (570-490 BC):

If there is to be peace in the world,
There must be peace in the nations.

If there is to be peace in the nations,
There must be peace in the cities.

If there is to be peace in the cities,
There must be peace between neighbors.

If there is to be peace between neighbors,
There must be peace in the home.

If there is to be peace in the home,
There must be peace in the heart.

Tuesday, April 8, 2014

Story paper?

If you have read this blog from the very beginning, you might have caught on that I adore these paper sculptures that I make. They are possibly my very favorite art form that I have ever made, and I can’t explain why, though I have tried. (Mr. Papermaker is not really crazy about them and is always mildly surprised when I sell one!)

Today, I finished one that I have been working on for quite a while and I am keeping it for myself. Here it is:


(Making these sculptures is my way of procrastinating when I am not in the mood to “work.” Rather than creating art for other people, my form of procrastination is to make art for myself.) I have never given a name to my paper sculptures but today I was thinking I should. The name should encompass something about stories, like Story Paper, except that’s not a very exciting name. You might never know it by looking at one quickly, but they have a world of stories in them. The papers I use to make them are from years of my life. I think of so many memories when I look at the papers. I recently came across this flower composition that I made years ago for a line of cards:


I can remember where I was in when I made this line. I was in my first studio, a little closet of a room that I shared with a good friend who made glass mosaics. The studio was in a ramshackle house with artists renting spaces in every nook and cranny. But it felt special because our work had to be approved to be accepted in. It was in a questionable neighborhood but we thought we were so very special to have a corner there, where we split the $30/month rental fee for the room so we could have a place where we could let the creativity fly, commune with other artists, get inspiration and feedback, and not have to clean up our mess at the end of the day. Many happy, creative hours were spent there. Anyway, that’s a very long sidebar just to say that I came across this little paper flower collage recently, smiled at the recollection of my days at that first studio, then rolled it up and stuck it in. I know exactly where it is and I will remember those studio days every time I see it. So many other papers in the sculpture hold such memories for me. You can see what I mean when you look at a side view of them to see all the nuances of each piece of paper, the texture, colors, inclusions. You may not know the stories but I hope that people sense them living in those sheets of paper. I feel everyone should decorate their homes with art that is appealing to look at and create conversation, but also has a deeper emotional connection, whether private or obvious, with those viewing the piece.


I have been trying to make a series of them to hang in my studio, a large set of 9 of them that could be hung like a sculptural quilt, each one with a different color focus. But I keep selling them before I can get a collection together. So, as I say every time I make one, I am keeping this one. But this time I really mean it.

Thursday, April 3, 2014

Painting with pulp

I can’t wrap my head around this artwork. It looks like a pretty pastel painting, done on an easel beside a view. But it is not. It is all made with wet paper pulp, painstakingly dyed and applied to a screen in little precise bits at a time to create a whole picture. It has to be done inside a studio with screens and vats and buckets of pulp. No paint of any kind is added to the surface. I don’t how she does it, but I imagine paper artist Meg Black must have to completely plan it on paper with a pen before starting. What really boggles my mind is how she is able to capture such lovely colors. When paper pulp is wet, it is much darker than it looks when it dries. To get all the different shades just right while working with wet pulp ... well, she must be infinitely patient. I have admired her artwork for years, especially because I have tried “pulp painting” before. There are additives in correct proportions that must be used to thin the pulp so the painter is able to manipulate it. For instance, an artist can make very fine lines by putting the pulp into a squeeze bottle; however, untreated pulp will clump and clog the nozzle. If you would like to see my attempt at pulp painting, scoot down a page or two in this blog to the entry, “Valley Artisans Market.” You can see my pulp painting on the wall in the photo. Trust me, it looks nothing like Meg’s work! To see more of her wonderful creations, go to www.megblack.com.